No edit summary |
No edit summary |
||
| (3 intermediate revisions by the same user not shown) | |||
| Line 3: | Line 3: | ||
== Creating an AWS account == | == Creating an AWS account == | ||
<syntaxhighlight lang="powershell"> | |||
Sign into or setup an AWS console account. | Sign into or setup an AWS console account. | ||
https://aws.amazon.com/ | https://aws.amazon.com/ | ||
</syntaxhighlight> | |||
[[File:Awsconsole.png|frameless|600x600px]] | [[File:Awsconsole.png|center|frameless|600x600px]] | ||
<syntaxhighlight lang="powershell"> | |||
If you do not have an account go ahead and create one here. You will need to place a credit card on file. (There is no charge) | If you do not have an account go ahead and create one here. You will need to place a credit card on file. (There is no charge) | ||
</syntaxhighlight> | |||
[[File:Login.png|frameless|600x600px]] | [[File:Login.png|center|frameless|600x600px]] | ||
<syntaxhighlight lang="powershell"> | |||
You can either search for IAM or click on the IAM link below. | You can either search for IAM or click on the IAM link below. | ||
</syntaxhighlight> | |||
[[File:Iam.png|frameless|600x600px]] | [[File:Iam.png|center|frameless|600x600px]] | ||
<syntaxhighlight lang="powershell"> | |||
On the IAM dashboard click on Users. | On the IAM dashboard click on Users. | ||
</syntaxhighlight> | |||
[[File:Users.png|frameless|600x600px]] | [[File:Users.png|center|frameless|600x600px]] | ||
<syntaxhighlight lang="powershell"> | |||
In the Users dashboard click on "New User". | In the Users dashboard click on "New User". | ||
</syntaxhighlight> | |||
[[File:User.png|frameless|600x600px]] | [[File:User.png|center|frameless|600x600px]] | ||
<syntaxhighlight lang="powershell"> | |||
On the New User dashboard, give your new user name and click next. | On the New User dashboard, give your new user name and click next. | ||
</syntaxhighlight> | |||
[[File:Name.png|frameless|600x600px]] | [[File:Name.png|center|frameless|600x600px]] | ||
<syntaxhighlight lang="powershell"> | |||
Next: | Next: | ||
1. Select "Attach Policies Directly" | |||
2. Search for "API" | |||
3. Select "AmazonAPIGatewayAdministrator" | |||
4. Click "Next" at the bottom of the page. | |||
</syntaxhighlight> | |||
[[File:Admin.png|frameless|600x600px]] | [[File:Admin.png|center|frameless|600x600px]] | ||
<syntaxhighlight lang="powershell"> | |||
Make sure everything looks good and click next. | Make sure everything looks good and click next. | ||
</syntaxhighlight> | |||
[[File:Create.png|frameless|600x600px]] | [[File:Create.png|center|frameless|600x600px]] | ||
<syntaxhighlight lang="powershell"> | |||
On the next screen, we see that our user has been created | On the next screen, we see that our user has been created successfully! Click on "View User". | ||
</syntaxhighlight> | |||
[[File:View.png|frameless|600x600px]] | [[File:View.png|center|frameless|600x600px]] | ||
<syntaxhighlight lang="powershell"> | |||
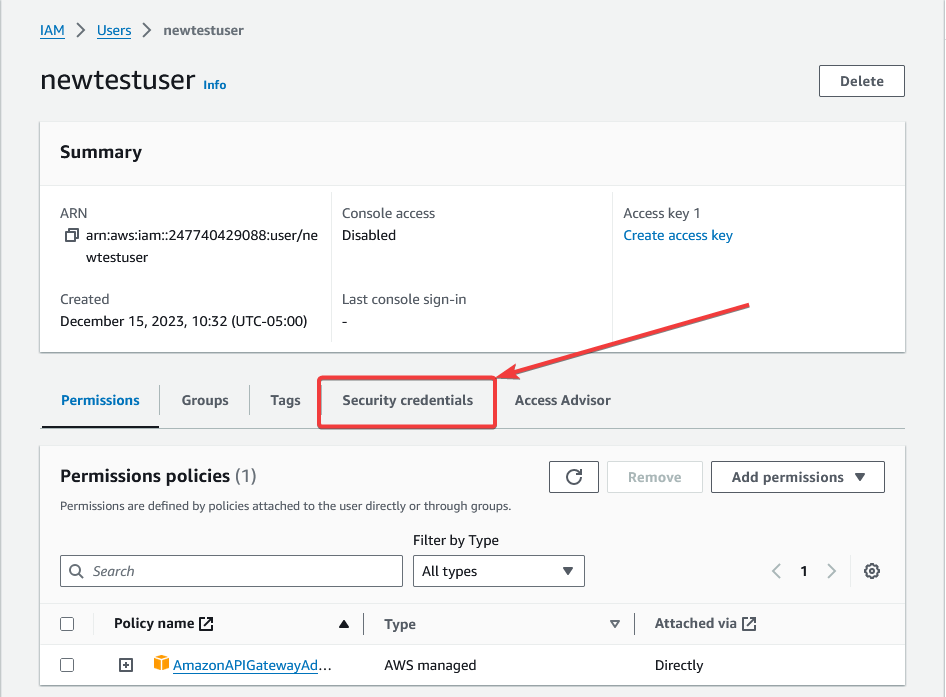
In the User Profile click on Security Credentials. | In the User Profile click on Security Credentials. | ||
</syntaxhighlight> | |||
[[File:Creds.png|frameless|600x600px]] | [[File:Creds.png|center|frameless|600x600px]] | ||
<syntaxhighlight lang="powershell"> | |||
Scroll down to Access Keys and click "Create access key" | Scroll down to Access Keys and click "Create access key" | ||
</syntaxhighlight> | |||
[[File:Createkey.png|frameless|600x600px]] | [[File:Createkey.png|center|frameless|600x600px]] | ||
<syntaxhighlight lang="powershell"> | |||
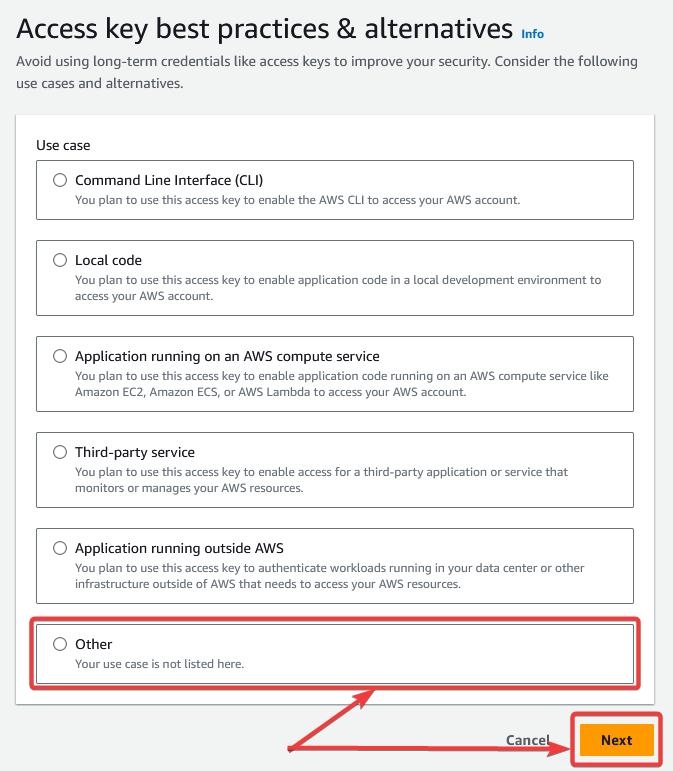
Select "Other" then click next. | Select "Other" then click next. | ||
</syntaxhighlight> | |||
[[File:Other.png|frameless|687x687px]] | [[File:Other.png|center|frameless|687x687px]] | ||
<syntaxhighlight lang="powershell"> | |||
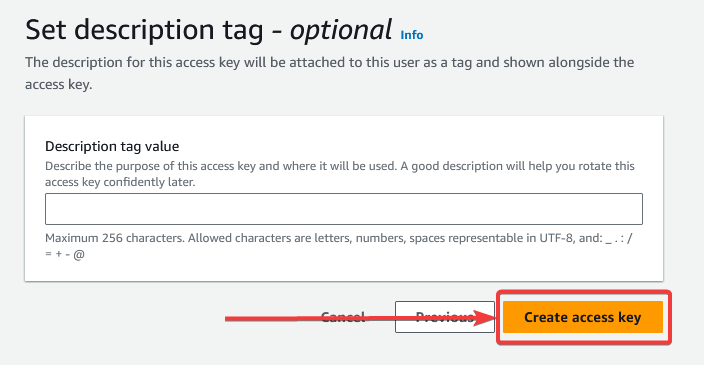
Click on "Create access key". As it states the Description Tag Value is optional, so you can leave it blank. | Click on "Create access key". As it states the Description Tag Value is optional, so you can leave it blank. | ||
</syntaxhighlight> | |||
[[File:Optional.png|center|frameless|600x600px]] | |||
'''<big>******************************************* PAY ATTENTION TO THIS! **********************************************</big>''' | |||
<syntaxhighlight lang="powershell"> | |||
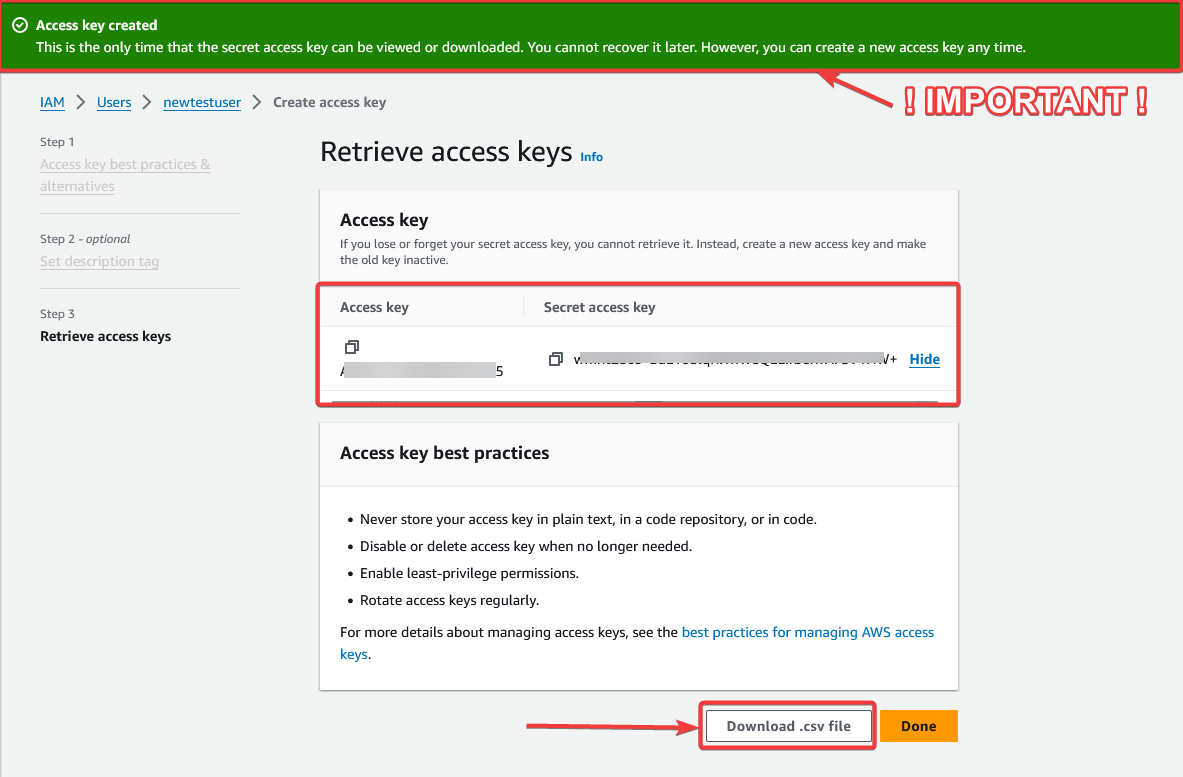
On the screen below. Make sure you note down your "Access Key" and "Secret Access Key" BEFORE clicking done. You can also download the information with the "Download.csv file" Button at the bottom. As the banner says you will NOT be able to retrieve these after closing this window. | |||
</syntaxhighlight> | |||
[[File:Important.png|center|frameless|600x600px]] | |||
<syntaxhighlight lang="powershell"> | |||
If all goes correctly, you should see this on the user's dashboard now under "Access Keys" | |||
</syntaxhighlight> | |||
[[File:Awsfinished.png|center|frameless|600x600px]] | |||
<syntaxhighlight lang="powershell"> | |||
Congrats! Your AWS is ready to go! | |||
</syntaxhighlight>'''Before leaving AWS let's grab our region, as we will need this below.''' | |||
[[File:Consolehome.png|center|frameless|600x600px]] | |||
<syntaxhighlight lang="powershell"> | |||
On the console home page, the region for your account should be visible. | |||
</syntaxhighlight> | |||
[[File:Ec2dashboard.png|center|frameless|600x600px]] | |||
== FireProx == | |||
=== Prerequisites: === | |||
<syntaxhighlight lang="powershell"> | |||
1. Have an AWS account with Secret Key and Access Key. (Follow Instructions Above) | |||
2. Your AWS region. (Also located above) | |||
3. Have Docker installed. | |||
</syntaxhighlight> | |||
=== Install === | |||
<syntaxhighlight lang="bash"> | |||
$ git clone https://github.com/ustayready/fireprox | |||
$ cd fireprox | |||
$ docker build -t fireprox . | |||
</syntaxhighlight> | |||
== | === Configure === | ||
<syntaxhighlight lang="bash"> | |||
$ docker run --rm -it fireprox --access_key <YOUR_ACCESS_KEY> --secret_access_key <YOUR_SECRET_KEY> --region <YOUR_REGION> --command create --url https://www.whatsmyip.org | |||
</syntaxhighlight> | |||
[[File:Fireprox1.png|center|frameless|900x900px]] | |||
[[File:Fprox2.png|center|frameless|900x900px]]<syntaxhighlight lang="powershell"> | |||
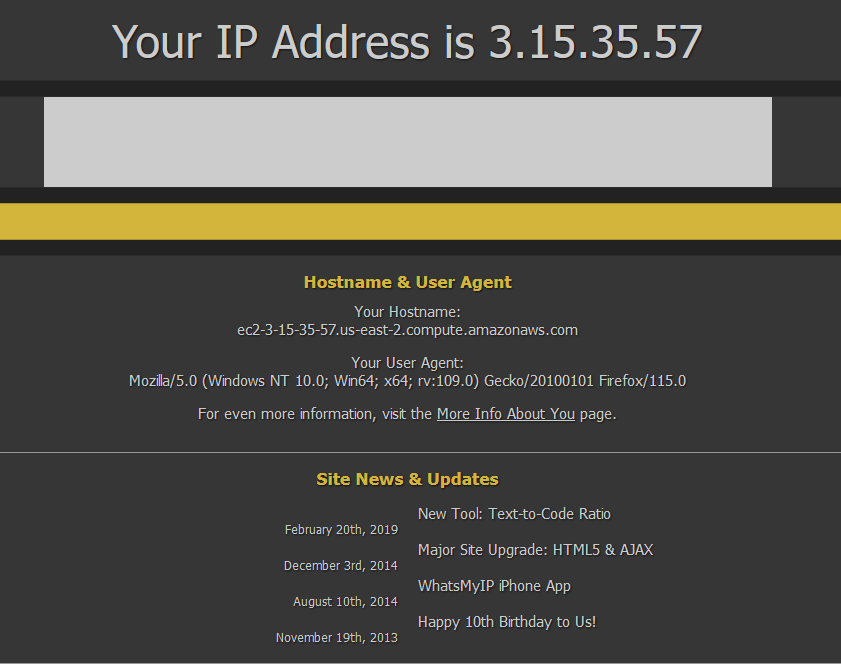
When you visit the site that is generated, you will notice that the IP changes every time you refresh the page. | |||
</syntaxhighlight><gallery mode="nolines" widths="300" heights="300"> | |||
File:Ip3.png | |||
File:Ip2.png | |||
File:Ip1.png | |||
</gallery><syntaxhighlight lang="powershell"> | |||
Once you have reached this point. FireProx is ready to go and you can move on to installing credmaster. | |||
</syntaxhighlight> | |||
== CredMaster == | == CredMaster == | ||
Latest revision as of 13:56, 15 December 2023
Creating an AWS account
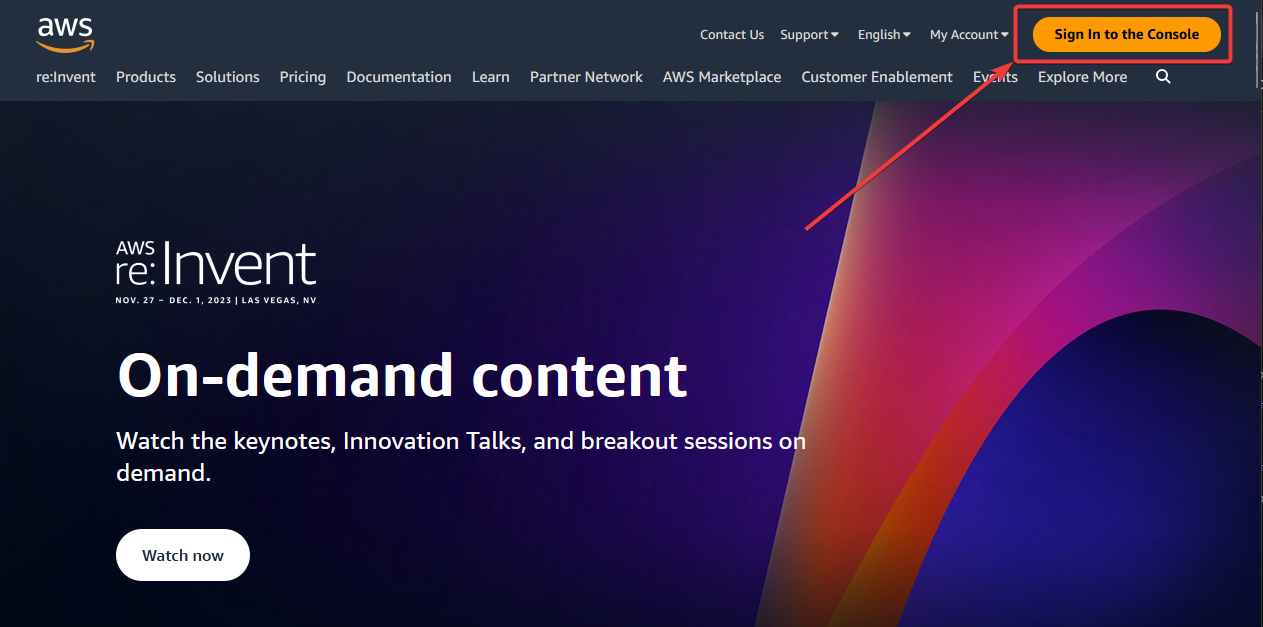
Sign into or setup an AWS console account.

https://aws.amazon.com/
If you do not have an account go ahead and create one here. You will need to place a credit card on file. (There is no charge)
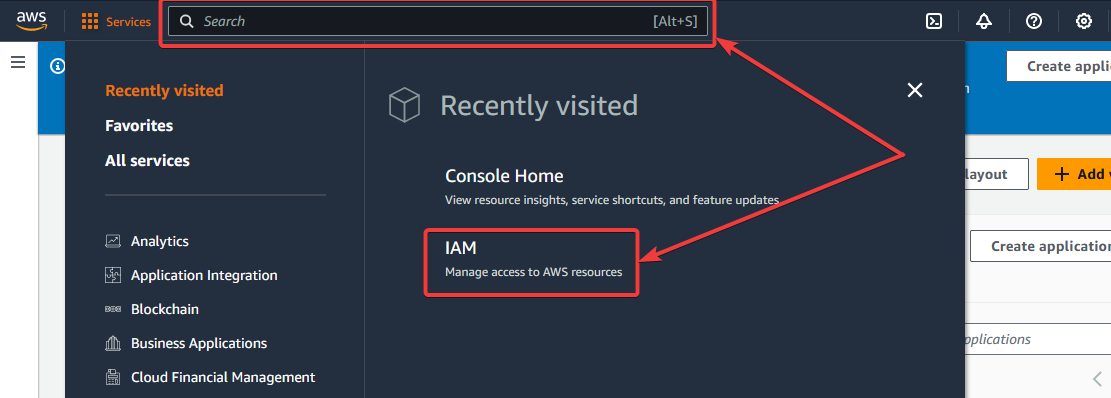
You can either search for IAM or click on the IAM link below.
On the IAM dashboard click on Users.
In the Users dashboard click on "New User".
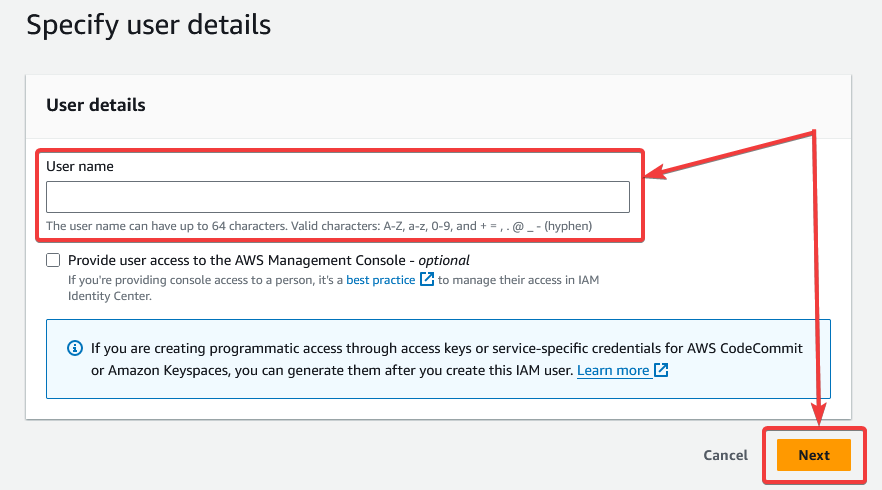
On the New User dashboard, give your new user name and click next.
Next:

1. Select "Attach Policies Directly"
2. Search for "API"
3. Select "AmazonAPIGatewayAdministrator"
4. Click "Next" at the bottom of the page.
Make sure everything looks good and click next.
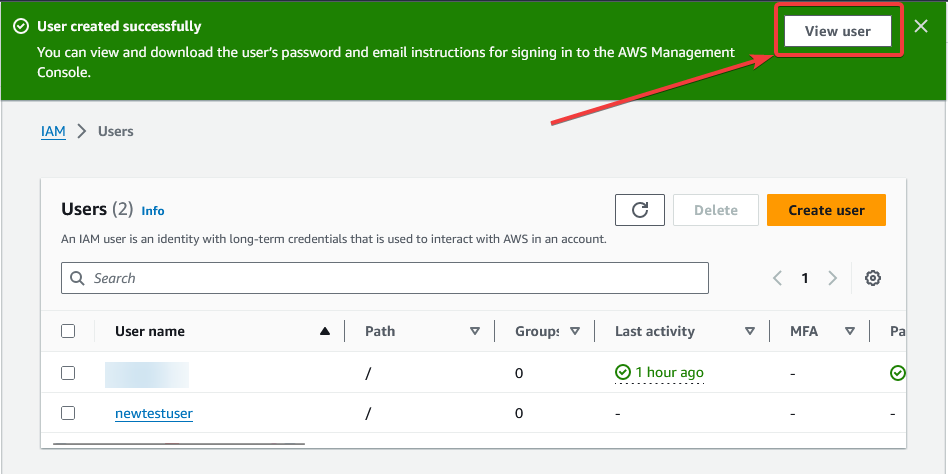
On the next screen, we see that our user has been created successfully! Click on "View User".
In the User Profile click on Security Credentials.
Scroll down to Access Keys and click "Create access key"
Select "Other" then click next.
Click on "Create access key". As it states the Description Tag Value is optional, so you can leave it blank.
******************************************* PAY ATTENTION TO THIS! **********************************************
On the screen below. Make sure you note down your "Access Key" and "Secret Access Key" BEFORE clicking done. You can also download the information with the "Download.csv file" Button at the bottom. As the banner says you will NOT be able to retrieve these after closing this window.
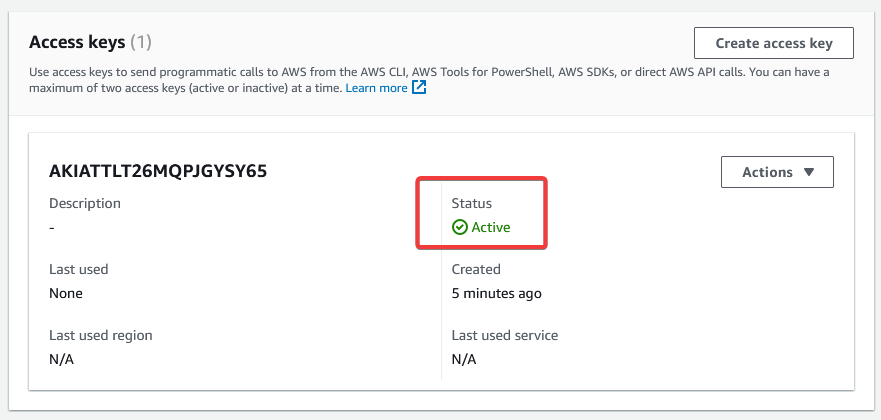
If all goes correctly, you should see this on the user's dashboard now under "Access Keys"
Congrats! Your AWS is ready to go!
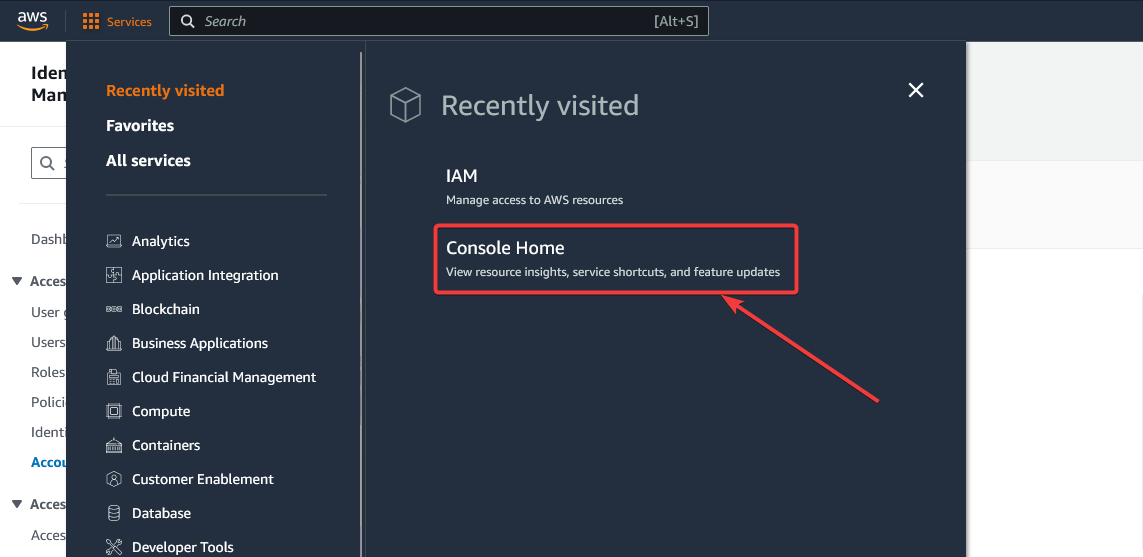
Before leaving AWS let's grab our region, as we will need this below.
On the console home page, the region for your account should be visible.
FireProx
Prerequisites:
1. Have an AWS account with Secret Key and Access Key. (Follow Instructions Above)
2. Your AWS region. (Also located above)
3. Have Docker installed.
Install
$ git clone https://github.com/ustayready/fireprox
$ cd fireprox
$ docker build -t fireprox .
Configure
$ docker run --rm -it fireprox --access_key <YOUR_ACCESS_KEY> --secret_access_key <YOUR_SECRET_KEY> --region <YOUR_REGION> --command create --url https://www.whatsmyip.org
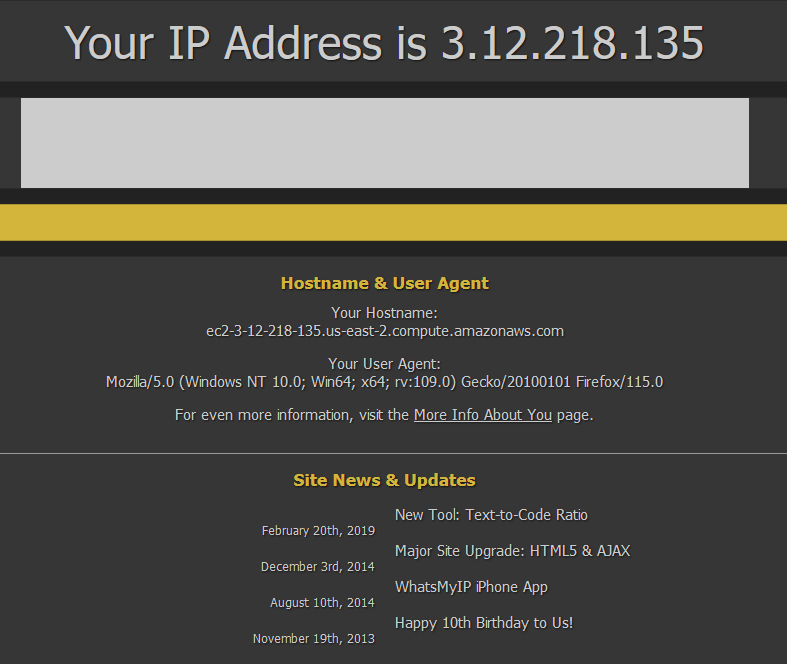
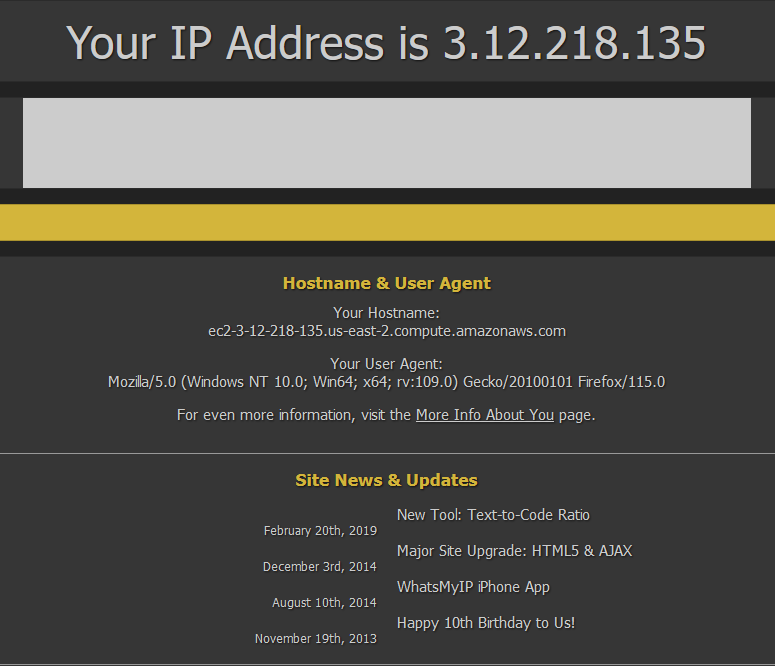
When you visit the site that is generated, you will notice that the IP changes every time you refresh the page.
Once you have reached this point. FireProx is ready to go and you can move on to installing credmaster.
